Left Miter Table Install
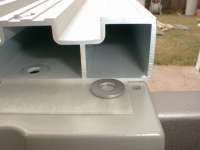 To add a second bolt to rear of the Miter Table I slid it back far enough to mark the location for the hole to drill.
Using a washer to locate the hole I position it so it clears the upright inside the Miter Table and the screw from the underside of the rear cabinet panel.
I centered it in the middle of the top edge of the rear cabinet panel. I drilled a 9/32" hole for the new mounting bolt.
To add a second bolt to rear of the Miter Table I slid it back far enough to mark the location for the hole to drill.
Using a washer to locate the hole I position it so it clears the upright inside the Miter Table and the screw from the underside of the rear cabinet panel.
I centered it in the middle of the top edge of the rear cabinet panel. I drilled a 9/32" hole for the new mounting bolt.I placed a piece of tape on the bottom of the Miter Table so I could mark the hole location from the underside to drill in the Miter Table.
Click the images for a larger view.
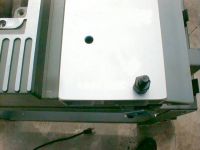 I installed the original mounting bolt in the original hole to position the Miter Table where it will be mounted. I marked the new hole location on the Miter Table from the underside of the saw.
I drilled a 9/32" hole and deburred it.
I installed the original mounting bolt in the original hole to position the Miter Table where it will be mounted. I marked the new hole location on the Miter Table from the underside of the saw.
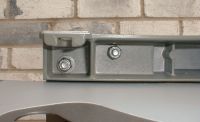
I drilled a 9/32" hole and deburred it.Notice I double nutted the original bolt with two of the original mounting nuts that came with the Miter Table.
Click the image for a larger view.
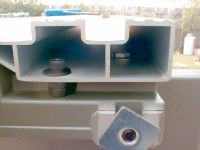 Without a washer on the underside of the Miter Table the two original nuts are just the right height to fill in the space between the Miter Table and the main saw table.
It worked out that way on my saw but may not on other saws.
Without a washer on the underside of the Miter Table the two original nuts are just the right height to fill in the space between the Miter Table and the main saw table.
It worked out that way on my saw but may not on other saws.Notice how the washer on the new bolt just clears the upright in the Miter Table.
It has to be close to the upright to clear the screw head on the underside.
Click the images for a larger view.
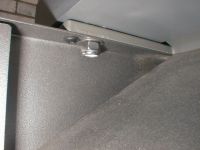 This is the underside view of the rear of the Miter Table after installing.
Notice how close the washer is to the head of the screw, it's close but it will fit.
If it doesn't turn out that way on your saw you could grind a flat on one side of the washer to clear the screw head or the upright in the Miter Table.
This is where the longer 1" bolt is used, a shorter 3/4" bolt is shown here.
Measure twice, drill once.
 The front end of the Miter Table is done about the same way as the back end.
The only difference being instead of clearing the screw head you have to clear the rail locking lever mechanism.
The front end of the Miter Table is done about the same way as the back end.
The only difference being instead of clearing the screw head you have to clear the rail locking lever mechanism.The new bolt hole is centered inside the opening in the left side of Miter Table. It's positioned close to the back side of the cavity in the main saw table.
I drilled a 9/32" hole in the main saw table first then marked the Miter Table.
Now with four bolts in the Miter Table I think it will stay in place when aligned.
The next step is to align the Miter Table. See Left Miter Table Alignment.